In the digital age, having a well-designed and optimized website is no longer a luxury—it's a necessity. But how do you ensure your website is performing at its best?
Enter Webflow and Google Analytics, two powerful tools that, when used together, can provide invaluable insights and help you optimize your website's performance.
This article will explore how these tools work, why they're essential, and how to leverage them. We'll also highlight how our team at LoudFace, a leading Webflow-certified agency, can help you navigate this process.
How do I connect Google Search Console to Webflow?
There are two ways to connect your Webflow domain with Google Search Console and start analyzing your data.
Method 1: Direct Integration in Webflow Settings

Step 1: Go to Google Search Console and log into the site. If you already have an account, click “Add a new property” from the left panel. If you don’t, you’ll see the option to add one.
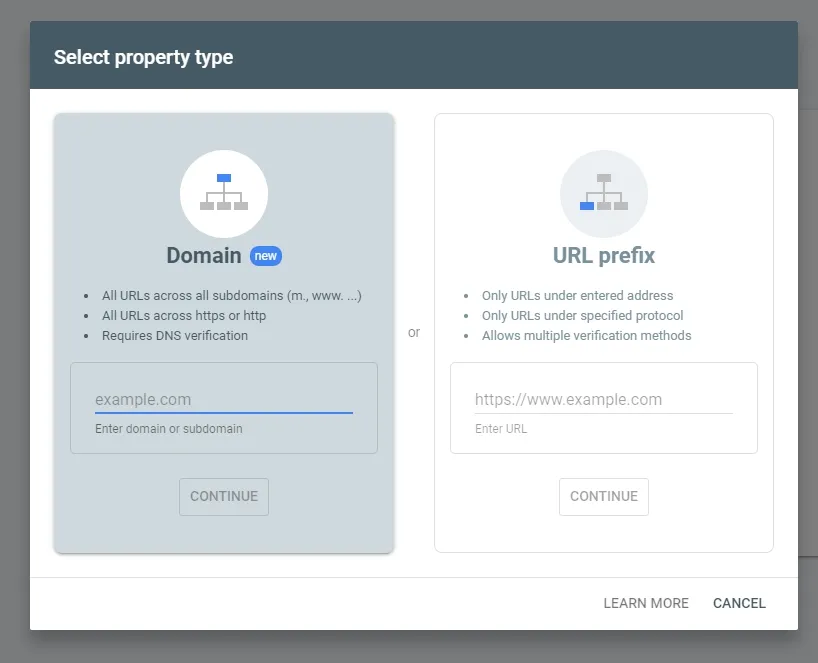
Step 2: Under property type, select “Domain” and enter the URL of your website. Press continue and copy the Google site verification code.
Step 3: Log in to your Webflow Dashboard and go to workspaces. Hover your cursor over the intended domain and click the gear icon to go to Site Settings.
Step 4: Under site settings, click on SEO in the left navigation menu. Scroll down to Google site verification ID and paste the code we copied in step 2.
Step 5: Hit publish and wait for Google Search Console to gather your data!
Method 2: Use Google Tag Manager

Alternatively, you can use Google Tag Manager (GTM) to set up a Search Console for your domain. The advantage of this would be that you can integrate all apps onto the website using a single script.
Note: If you have already set up the Google Tag Manager, skip Step 7.
Step 1: Visit **Google Tag Manager** and use your intended Google account. Once you’re in, create a new account.
Step 2: Fill in all the details and select “Web” under the target platform in the container setup.
Step 3: Inside the container, click “Admin” from the menu bar and select the “Install Tag Manager” option. From there, copy the head tag.
Step 4: Log in to your Webflow Dashboard and go to workspaces. ****Hover your cursor over the intended domain and click the gear icon to go to Site Settings.
Step 5: Under site settings, click on Custom code in the left navigation menu. Paste the head tag inside the head code block and hit publish.
Step 6: Switch to the GTM tab in your browser and enter the website URL to check if the tag is working properly.
Step 7: Go to Google Search Console and log into the site. If you already have an account, click “Add a new property” from the left panel. If you don’t, you’ll see the option to add one.
Step 8: Under property type, select “URL Prefix” and enter the URL of your website. Scroll down to Google Tag Manager and click on Verify.
How do I connect Google Analytics to Webflow?
There are two ways to connect your Webflow domain with Google Analytics and start analyzing your data.
Method 1: Direct Integration in Webflow Settings
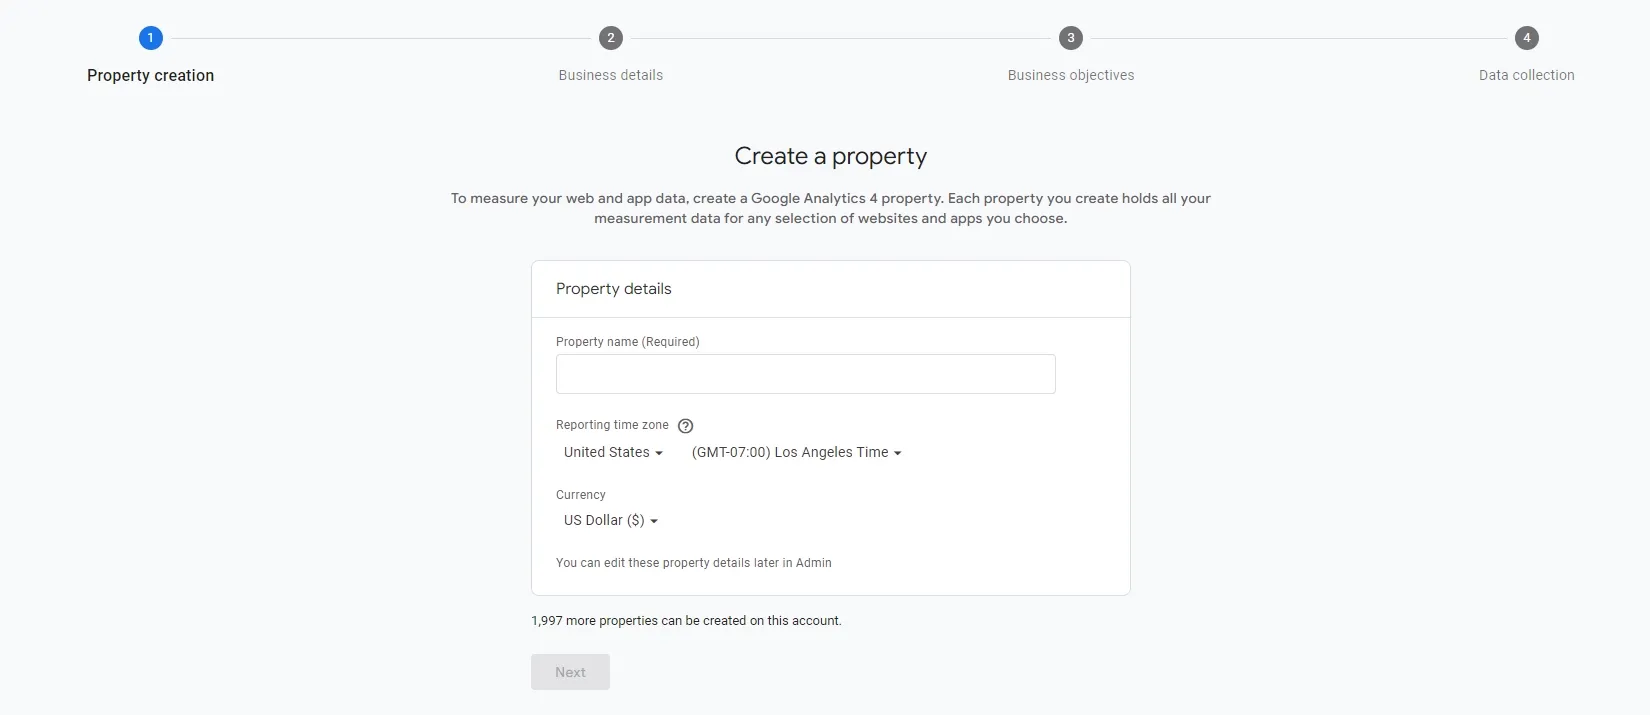
Step 1: Go to Google Analytics and log into the site. If you already have an account, click the gear icon on the bottom left of the panel and select “Create.”
Google Analytics has two stages of hierarchy: Account and Property (your domain /website). If you have an account, you can add the new property under it. Or you could create a new “account” (project) if this is an entirely separate entity from your existing properties.
If you don’t have an account, you’ll see the option to add one.

Step 2: Once you have chosen your desired setup, add all the details regarding your property and business until you reach the final step (data collection).
Step 3: Under data collection, choose your platform (web) and add the website link to create a “Data Stream.” Copy the GTM code provided by this data stream.
Step 4: Log in to your Webflow Dashboard and go to workspaces. Hover your cursor over the intended domain and click the gear icon to go to Apps and Integrations.
Step 5: Under site settings, click on SEO in the left navigation menu. Scroll down to Google Analytics -> Measurement ID and paste the GTM code we copied in step 3.
Step 5: Hit publish and wait for Google Analytics to gather your data!
Under apps and integrations in Webflow settings, you can add your Google Optimize and Meta Pixel code. So you can integrate them with your Webflow domain and start using them just like we did with Google Analytics.
Method 2: Use Google Tag Manager
If you want to use the least additional code on the website, you can always integrate Google Analytics and all the other services using Google Tag Manager.
Note: If you have already set up the Google Tag Manager, skip directly to Step 6.
Step 1: Visit **Google Tag Manager** and use your intended Google account. Once you’re in, create a new account.
Step 2: Fill in all the details and select “Web” under the target platform in the container setup.
Step 3: Inside the container, click “Admin” from the menu bar and select the “Install Tag Manager” option. From there, copy the head tag.
Step 4: Log in to your Webflow Dashboard and go to workspaces. ****Hover your cursor over the intended domain and click the gear icon to go to Site Settings.
Step 5: Under site settings, click on Custom code in the left navigation menu. Paste the head tag inside the head code block and hit publish.
Step 6: Go to Google Analytics and log into the site. If you already have an account, click the gear icon on the bottom left of the panel and select “Create.”
Google Analytics has two stages of hierarchy: Account and Property (your domain /website). If you have an account, you can add the new property under it. Or you could create a new “account” (project) if this is an entirely separate entity from your existing properties.
If you don’t have an account, you’ll see the option to add one.
Step 8: Once you have chosen your desired setup, add all the details regarding your property and business until you reach the final step (data collection).
Step 9: Under data collection, choose your platform (web) and add the website link to create a “Data Stream.” Copy the GTM code provided by this data stream.
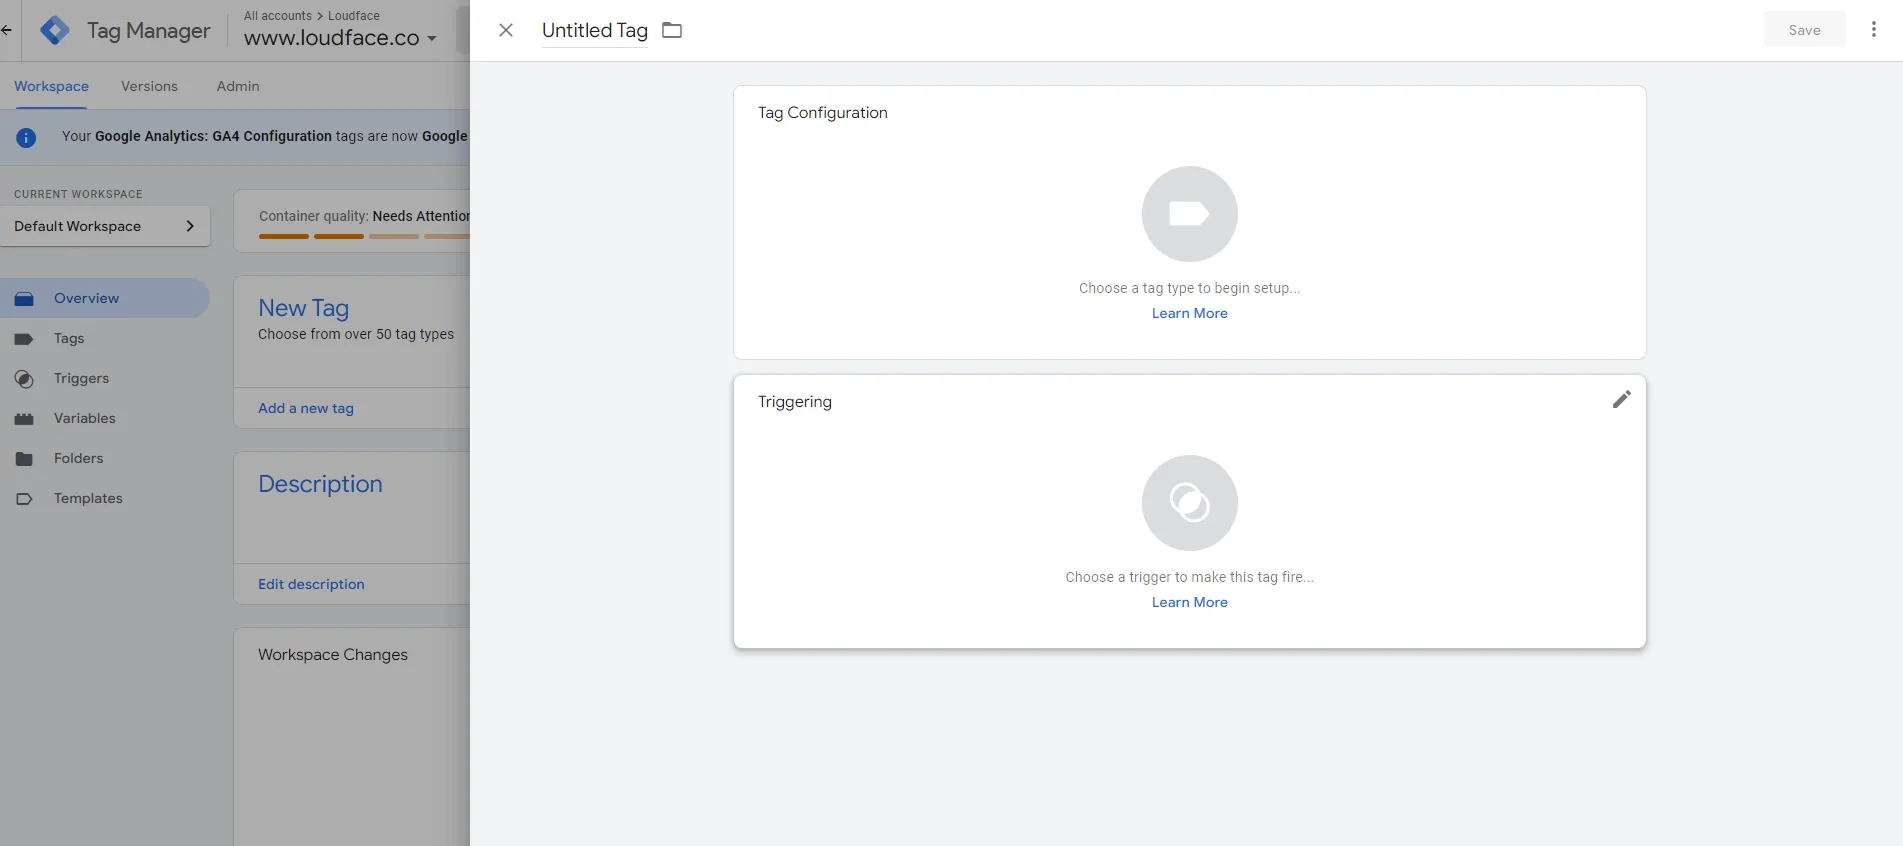
Step 10: Return to the Google Tag Manager and create a new tag. Select “Google Analytics” as the tag type and “GA4 Event” as the measurement event. Paste the GTM code and set your triggers to All Pages.
Step 11: Hit publish. Switch back to Google Analytics tab, enter your URL and click on “test” to verify the code.


